Translate

Wednesday, December 8, 2010

Day 7 & Day 8-HomeSpun Holiday

Day 7 & Day 8 of 25 Days til Christmas!! Since I was sick yesterday so I decided to combine the two days and good thing for it's a long post. Day 7 started with creating some Homespun Shabby Chic Ornaments.  Here are some snowflake ornaments I bought tons of last year at the $$ store, (you get 10 for a $) what a deal. Now you can find them in almost any color you want. Walmart even has them for $3.oo.
Step 1:  using the Tim Holtz Tattered Floral die cut, here I cut the floral out of pink felt.
             Step 2:  you will need a snowflake, the four tattered floral felt pieces.
                Step 3:  Stack the felt florals one on top of the other, with a needle and thread, sew on a button through all the felt layers. (or you can hot glue each layer together and hot glue a pearl or gem in the center).
                                                       your floral will look like this-
             Step 4:  Hot glue the felt floral to the white snowflake.
            press together carefully-not to burn yourself on the hot glue (I mean it's HOT)!! ouch
                                Almost done!!!! here is what it looks like so far, so shabby cute....
                     Here is one that I added a pearl to the center and some tinsel too!!! I really love this one...
             Step 5:  To make them sparkle and pop more, I added Silver Stickles to the ornament by first squeezing a dab on my craft matt and using my finger to control where I rub the glitter on....(please excuse my messy fingers I was coloring some fabric leaves before)....

             Step 6:  These snowflakes came with sliver hangers on them, but you can use any kind of trim as the hanger, or put a pin back on them to where on a Christmas Sweater or place pop dots on the back on the snowflake and use in a scrapbook layout or a card!!!!
                                                           here is a close up of my fave!!!!!
 Hope you enjoy making some Shabby Chic Ornaments to adorn your tree or put on your gifts as a tag. Now onto some sneak peaks of some handmade gifts I have been working on... Gift card set that I am not quite done with yet (will show when completed)  I just love these two little birds talking to each other-resting on some lovely tinsel mesh I found at Walmart  yesterday. The scrapbook papers are from Creative Imaginations IOD are so amazing and exciting to play with I feel like I am back in grade school in art class.

 I loved the snowflake ornament so much, I placed one on a card to go in the gift basket I am making for my mother in law (shhhhh) it's ok she doesn't have Internet so she won't see....
Well that's it for this Homespun Holiday tips and ideas....loving this challenge I am doing for the 25 Days til Christmas....it's pushing me outside my box.

brr it's cold outside like 17 degrees!!!!!!
Peggy Lee

Tuesday, December 7, 2010

Holiday Headache!!!

So sorry I woke up this morning with a headache that wouldn't go away-it didn't stop me from creating today or doing a little shopping. But while I was out picking up trims and gifts, my headache got much worse. By the time I picked up my girls from school=my simple pain in the neck headache (there is to much to do for a headache this time of the year) turned into a major migraine (the bad kind sick to my tummy-lights a killing one) so off to bed I went.
So please come back in the morning and I will have a post of  Day 7 and Day 8 of Homespun Holiday-25 days til Christmas.

I am going to try to do a little creating tonight.

Peggy Lee (we still have snow a fallen)....

Monday, December 6, 2010

Day 6-HomeSpun Holiday

Day 6 of 25 Days til Christmas!!!
Handmade cards are the best gift to give this holiday season, not are they fun to create they are fun to receive.
This happy holidays card was creative and love the colors (it's Basic Grey) winter's collection but I can't for the life of me remember what they called the line...sorry...I cut out the deer and cut two of the brown deer and popped him up for some detail, added stickles to the wreaths...so cute.
 Love the daisy die cut from Stampin up-this card is very simple (take a 12x12 piece of card stock cut at 4 inches you can get three cards out of one sheet cutting at 4". Added a strip of Graphic 45 papers, distress inks, a sentiment and pearl brad to finish off the card...Homespun feel.
 Love this one-Bo Bunny's new Christmas line, added some trims and card stock (red-I ran over my scissors edges to give a distress look and it feels like velvet. Cut out the holly from another paper and added a rub on, and trim...
Graphic 45 is one of my fav's love how these turned out-tree one is a pop out added some vintage photo. The next one I used up my scraps and cut strips and glued onto a card front added a sentiment and a flower with button...there you have it some Homespun handmade cards to share with family and friends.

Sunday, December 5, 2010

Day 5-HomeSpun Holiday

Day 5 of 25 Days til Christmas and what better way to celebrate it with the fresh fallen snow that delighted us this morning as we woke up from our warm beds. The girls couldn't wait until Church was done and we got home for them to get dressed and head out to make a snowman.
Emilee and Olivia have made their own tradition for the holidays, to make a snowman on the first fallen snow of the season...well they just didn't make one they made three...how cute are they!!!
  The homespun feel is the little hat this cute little girl snow lady is wearing my daughter Emilee made it last year for our cat Tigger who is no longer with us...but the girls thought let's share with the snow family....actually alot of what the snow family is wearing is handmade...

Day 5 homespun tip is get out and enjoy life-make a snowman, have a sled ride, throw a few snowballs!!! Take time to make a memory with family and friends....

Saturday, December 4, 2010

Day 4-HomeSpun Holiday

        Day 4 of 25 Days til Christmas, can you believe it, it's day four and we woke up to a winter wonderland (see last pic) that's right my car is covered with glitter!!! Homemade pearly white goodness....ok let's get right to our HomeSpun Holiday and the fabulous Lynne Forsythe
This past week we had a Christmas Card Class at our local scrapbook store where Lynne is the Manager and is a Instructor...the class was a complete BLAST!!!! I mean it, Lynne had a full class and boy the embossing powder and distress it all tool was making Christmas Cheer in the room...I still had embossing powder on my face when I crawled into bed.

Lynne is such an awesome teacher, she loves to share with others the style of embossing, distressing and taught us all about Ranger's products, yes this was an advance class in general but we had many beginners who where so excited about all the tips and great instructions from Lynne they are now hooked on making handmade cards, and can't wait until her next class. Isn't that the true gift of being a teacher, is to share the creative knowledge with others so they might see their hidden talent deep inside of them...   
Here are my creations from the class, the first one we did is with the rolled roses, I just love this card, and the coolest thing was every table had different type of embossing powder so every ones cards were different love that...., we used the same papers, card stock and trims on all three of the cards, she taught us how to get 3 cards out of a 12x12 piece of card stock. My favorite part was dragging distress inks over the embossed images (we used Tim Holtz embossing folders) and dusted them with embossing powder and let the magic happen plus the vintage photo ink and ripping of the papers. I felt like I was in Heaven!!!!! 

I love the Tim Holtz tattered floral die that we used to make this adorable Christmas wreath.

 Winter Wonderland, it's starting to look and feel like Christmas now...off to make some more fabulous Christmas cards.
 Just wanted to say thanks to Lynne for such an exciting and fun time...until next class. Be sure to stop over to Lynne's blog she has amazing art work and get tutorials there to share....

simply enjoy everyday moments....
Peggy Lee

Friday, December 3, 2010

Day 3-HomeSpun Holiday

 Day 3 of 25 Day til Christmas-I can't believe it's seems like it's going super fast this year...people do say time does go by faster when you are all grown up. I remember growing up time stood still almost, like Rudolph the Red Nose Reindeer show felt like a two hour movie, I was quite sad to find out as adult it's really only half hour long...crushed my world. No not really I still watch it every year with my family.


This got me thinking of how I love countdown calendars and every year I buy those $1.00 ones for my girls and Lee to have to open the whole month long...so this year I made one, well I bought the advent calendar kit at our local scrapbook store, and bought some beautiful scrapbook Christmas papers and made this little beauty.
This calendar is from Kaiser Craft and also is the Christmas papers I used. They where pretty popular, we sold out and couldn't get any more in the store. It was fun to create and fun to fill with chocolates and goodies.
The little goodie boxes are tiny matchbook matches, I covered them with papers, sanded the edges and inked to give a distress vintage feel. The Father Christmas and tree are free images off a online clip art site. You can find a ton of free images and clip art to use for you projects online.  To sum up Day 3 of HomeSpun Holiday, Lee and I had a lunch date (we really enjoyed him being able to get out and spend some time together) shhh we did a little Christmas shopping too, and bought four new tires for my car (boy that was expensive) there needs to be a button we can push for those items that we have to buy and need. Like Lee said praise God we had the money. Many blessings.
Hope you are enjoying your Holiday Season.

Thursday, December 2, 2010

Day 2-HomeSpun Holiday

 Day 2 of 25 Days til Christmas: HomeSpun Holiday

 Well to begin this morning is to say I hope everyone here in the Northeast is safe and warm in thier homes, we had a bad storm last night. The high winds and heavy rains, alot of trees down and people without power.
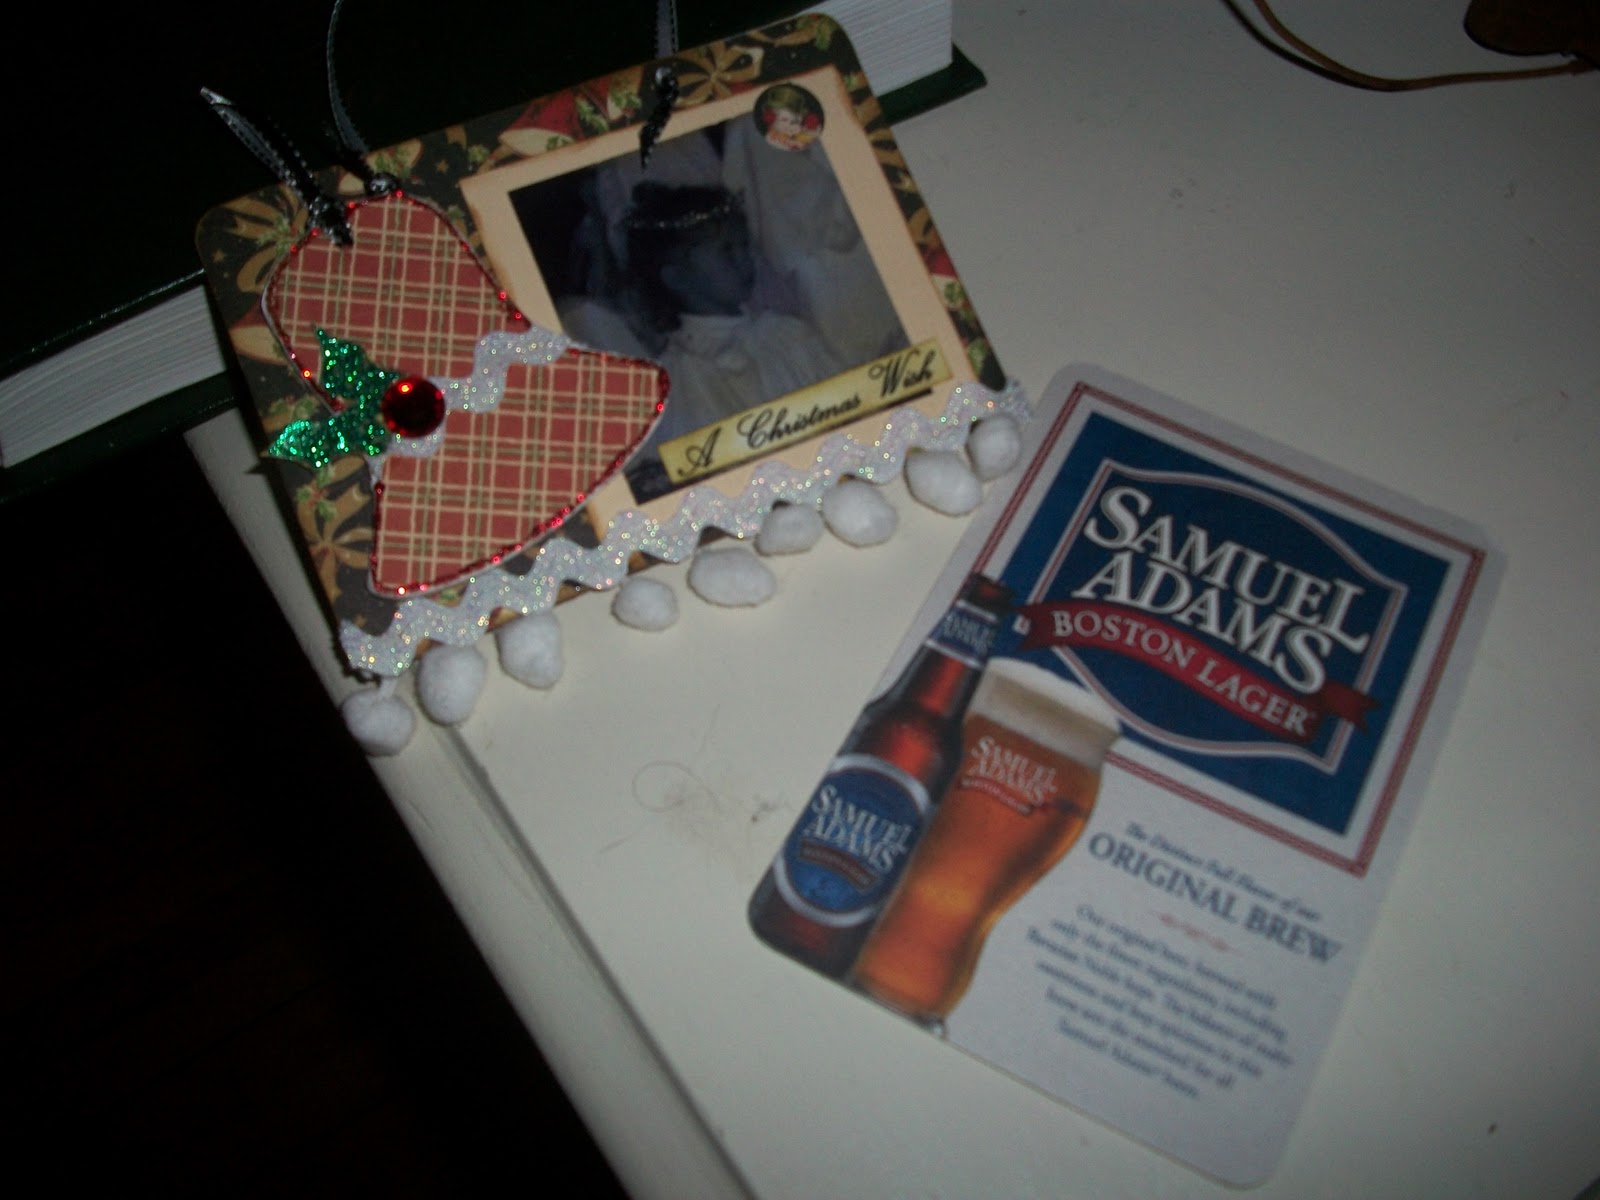
Ok let's get to Day 2 of HomeSpun Holiday-today I am sharing with you a handmade Christmas ornament I made last Christmas of my sweet niece as an angel in a Christmas program at the local Church....here is how I create it:
Supplies:
coaster (from a local restrurant) free!!!
Graphic 45 Christmas papers
chipboard
trims and embellishments
Stickles
Distress inks-vintage photo
glue and scissors

cover coaster with glue and add your favorite papers, add a photo and some little pretties!!! punch two holes add some ribbon and you have a handmade cute ornament to adore your tree.

 Here is a closer look-A Christmas Wish

This morning I get our page ready for the photos for Day 2 in our HomeSpun Holiday Scrapbook.
Tonight is OLDE TYME CHRISTMAS
in Lancaster, NH our family goes every year tonight should be snow a fallen. I added a shipping tag for adding some notes and title.
 here are some photos ready to be printed and added to Day 1-trimming the tree.....

family
little pretties!!!!

Wednesday, December 1, 2010

HomeSpun Holiday

 25 Days til Christmas
Can you believe it, today is the 1st day of December as well as many 1st day of countdown to the Holidays on many blogs, face books, art projects, school calendars, Church Christmas Programs....I love the Holidays!
This season is very dear to my heart and to my families as well, a little over three weeks ago my husband Lee went in for a simple two hour surgery for a torn rotor cuff. The surgery was over five hours long and with complication not to the shoulder but he had a little heart failure and hard time waking up...so off to another Hospital for to see if he had any blockages in his heart...and he did. three blockages and a narrowing one, the doctor's said it was good thing this happened during surgery, for with the percentages of blockages in his heart he was heading for a heart attack and would not have survived it....so all this to say that we are thankful and blessed to have our daddy, my husband still with us to enjoy everyday moments together.

This got me thinking about how Ali Edwards documents her Holiday with her family and friends...A December Dairy...hope on over to her blog to see her amazing scrap booking talent and her photos are out of this world. To get the countdown started with making my own Homespun Holiday Scrapbook, it's so fun and easy. I used to look at Ali's and think I could never make such a beautiful scrapbook like she does...so after many blog readings and drooling over Ali's work, and how this Holiday is so special to me. I did it, I jumped in and created in less than a few hours and simple homespun scrapbook.

Being that I decided to start this morning, I just grabbed a pile of Christmas papers and embellishments I had laying around to create my book, for the base I used a regular manila folder and cut it in half and cut some smaller to fit in between the pages (you will see that soon). Day 1-created the album and made this paper tree for tonight we are decorating our family Christmas Tree. I have no pictures yet to fill in but I will post them as I do scrap them.

 here is my pile of Christmas paper.

Here is our first photo we took tonight, before the decorations are put on....more to come!!! So stay tuned in daily to see how my Homespun Holiday Scrapbook is coming along and for more handmade ideas that I can't wait to share with you...and at the end of the 25 Days of Christmas I will have a goodie to give away!!!! Season's Greetings and grab the tinsel...

Peggy Lee

Thursday, November 25, 2010

Happy Thanksgiving

Here is our beautiful turkey for our Family Thanksgiving meal...what a beauty my husband cooked it with one arm...he had shoulder surgery and one arm is in a sling...but that didn't stop him from cooking the bird this year...he loves to cook for the family...
Just a quick note to wish all my blog scrappie friends a Happy Thanksgiving Day!!!! create a memory....

Wednesday, November 10, 2010

Getting into the Holiday Spirit with Mistletoe

Here are my new creations "Christmas Cones", aren't they just so cute.
This first one is created out of a 12x12 piece of card stock and cut down to a 9x9 piece. I saw these made on some one's blog and my bad can't remember the name of the lady or her blog sorry....so I can't take credit for this idea but I did change her directions a little...and my embellishments too. I just love this stamp set "St. Nick" (B1356) CTMH has in the new Idea Book.

The pattern paper is CTMH Mistletoe Level 2 Paper Packet (X7130B) I love the rich colors in this packet. And I love CTMH card stock that has a white core, for when you sand the edges the white appears and gives a distress look....I also inked the edges with Chocolate ink.
Here is a smaller size Christmas Cone to hang on your tree to put candy in or a gift card. I cute the pattern paper down to 6x6 perfect size for a small gift.
All supplies are CTMH....
grab a hot cup of coca and start creating your Christmas gifts or decorations....enjoy

Monday, November 8, 2010

new post soon

sorry I have been so busy with my family and not feeling good, just wanted to drop you a line to let you all know. I will have a new post soon...working on some artwork to share.

peggy lee